


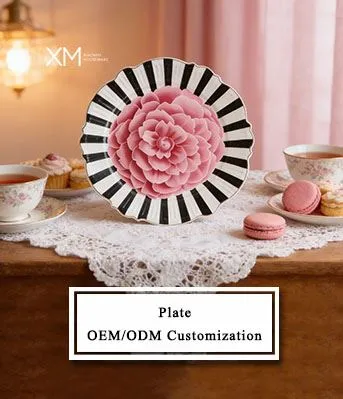




Hey there! As a supplier of porcelain cup and saucer sets, I'm super excited to take you behind the scenes and share the production process of these beautiful pieces. It's a journey that combines artistry, science, and a whole lot of patience. So, let's dive in!
Step 1: Selecting the Right Clay
The first step in making a porcelain cup and saucer is choosing the right clay. Porcelain is made from a special type of clay called kaolin, which is known for its fine particles and high plasticity. This clay gives porcelain its characteristic translucency, strength, and white color.
We source our kaolin from trusted suppliers who ensure its quality and purity. Once we have the clay, we test it to make sure it meets our standards. We check for things like moisture content, particle size, and plasticity to ensure that it will work well in the production process.
Step 2: Preparing the Clay
After selecting the clay, it's time to prepare it for shaping. This involves several steps, including wedging and kneading the clay to remove any air bubbles and make it more uniform. Wedging is a process of pushing and folding the clay to compress it and remove air pockets. This helps to prevent the clay from cracking or exploding during firing.
Once the clay is wedged, we may add water or other additives to adjust its consistency. This makes it easier to work with and helps to achieve the desired shape. The prepared clay is then left to rest for a period of time to allow it to become more pliable and easier to shape.
Step 3: Shaping the Cup and Saucer
Now comes the fun part - shaping the cup and saucer! There are several methods we can use to shape the clay, including throwing on a potter's wheel, hand-building, and using molds.
- Throwing on a Potter's Wheel: Throwing is a traditional method of shaping clay on a spinning wheel. The potter uses their hands to shape the clay into the desired form, such as a cup or saucer. This method requires skill and practice, but it allows for a high degree of control and creativity.
- Hand-Building: Hand-building involves shaping the clay by hand using various techniques, such as pinching, coiling, and slab building. This method is more flexible and allows for unique and irregular shapes. Hand-built pieces often have a more organic and rustic look.
- Using Molds: Molds are a convenient way to produce consistent and uniform shapes. We can use plaster molds or silicone molds to create the basic shape of the cup and saucer. The clay is pressed into the mold and then removed once it has set. This method is ideal for mass production.
Once the cup and saucer are shaped, we use tools to refine the edges, smooth the surfaces, and add any decorative details. This may include adding handles, rims, or patterns to the pieces.
Step 4: Drying the Clay
After shaping, the cup and saucer need to be dried slowly to prevent cracking. This is a critical step in the production process, as rapid drying can cause the clay to shrink and crack. We place the pieces in a controlled environment with low humidity and good ventilation to allow them to dry gradually.
The drying process can take several days or even weeks, depending on the size and thickness of the pieces. We monitor the drying process closely to ensure that the pieces are drying evenly and not developing any cracks or warping.
Step 5: Bisque Firing
Once the clay is completely dry, it's time for the first firing, known as the bisque firing. Bisque firing is a low-temperature firing that hardens the clay and makes it porous. This allows the pieces to absorb the glaze more easily during the next step.
We place the dried cup and saucer in a kiln and heat them to a temperature of around 900 - 1000°C (1652 - 1832°F). The firing process takes several hours, and we carefully control the temperature and firing time to ensure that the pieces are fired evenly and not over-fired or under-fired.


After the bisque firing, the cup and saucer are removed from the kiln and allowed to cool. They are now hard and ready for the next step - glazing.
Step 6: Glazing
Glazing is the process of applying a thin layer of glassy material to the surface of the cup and saucer. Glaze not only adds color and decoration to the pieces but also makes them waterproof and more durable.
We use a variety of glazes, including clear glazes, colored glazes, and decorative glazes. The glaze is applied to the bisque-fired pieces using a brush, spray gun, or dipping method. We carefully control the thickness and application of the glaze to ensure a smooth and even finish.
Once the glaze is applied, the pieces are left to dry again. This drying process is usually shorter than the initial drying process, as the glaze is thinner and dries more quickly.
Step 7: Final Firing
The final firing, also known as the glaze firing, is the most critical step in the production process. This is when the glaze melts and fuses to the surface of the cup and saucer, creating a hard, smooth, and durable finish.
We place the glazed pieces in the kiln and heat them to a higher temperature than the bisque firing, usually around 1200 - 1400°C (2192 - 2552°F). The firing process takes several hours, and we carefully control the temperature and firing time to ensure that the glaze melts evenly and forms a strong bond with the clay.
After the final firing, the cup and saucer are removed from the kiln and allowed to cool. They are now ready for inspection and quality control.
Step 8: Inspection and Quality Control
Once the pieces have cooled, we inspect them carefully to ensure that they meet our quality standards. We check for any defects, such as cracks, chips, or uneven glazing. Any pieces that do not meet our standards are either repaired or discarded.
We also test the pieces for functionality, such as their ability to hold liquid without leaking and their resistance to heat and wear. Only the pieces that pass our rigorous quality control tests are approved for sale.
Step 9: Packaging and Shipping
After the inspection, the cup and saucer are carefully packaged to protect them during shipping. We use high-quality packaging materials, such as bubble wrap and cardboard boxes, to ensure that the pieces arrive at their destination in perfect condition.
We offer a variety of shipping options to meet the needs of our customers, including standard shipping, express shipping, and international shipping. We work with reliable shipping carriers to ensure that the pieces are delivered safely and on time.
Conclusion
And there you have it - the production process of a porcelain cup and saucer! It's a long and complex process that requires skill, patience, and attention to detail. But the end result is a beautiful and functional piece of art that can be enjoyed for years to come.
At our company, we take pride in producing high-quality porcelain cup and saucer sets that are both beautiful and durable. Whether you're looking for a Porcelain Gold Cup and Saucer, a Porcelain Tea Cup and Saucer, or a Fine Porcelain Cup and Saucer, we have a wide range of options to choose from.
If you're interested in purchasing our porcelain cup and saucer sets or have any questions about our products, please don't hesitate to contact us. We'd love to hear from you and help you find the perfect set for your needs.
References
- "Porcelain: A Comprehensive Guide." Potter's Monthly, 2020.
- "The Art of Ceramics: Techniques and Traditions." Smith, John. 2018.
- "Glazing Techniques for Porcelain." Ceramic Arts Daily, 2019.